A Guide to Flipkart Seller Registration for Selling Products Online
In today’s digital age, the real marketplace isn’t just in crowded bazaars or high-street shops—it’s online. Selling your products on the internet isn’t just a trend anymore, it’s a game-changer. With platforms like Flipkart bringing millions of customers right to your (virtual) doorstep, even small businesses and new entrepreneurs are finding big success from behind a screen.
In this article, we’ll dive into why selling online can transform your business—and give you a step-by-step guide on how to start selling your product on Flipkart, one of India’s largest and most trusted online marketplaces. Whether you’re just starting out or looking to expand your reach, this is the perfect place to begin your journey into the world of e-commerce.
Why Selling Product Online on Flipkart is a Game-Changer for Your Business
In today’s digital world, having an online presence isn’t just a bonus — it’s a necessity. Whether you’re a small business owner, an aspiring entrepreneur, or a well-established brand, selling online opens up a world of opportunities that physical stores simply can’t match. Let’s explore the powerful benefits of taking your business online and how platforms like Flipkart Seller Hub can help you scale like never before.
1. Shopping Made Super Easy for Customers
Imagine your customers being able to browse, select, and pay for your products — all within minutes, without ever leaving their home. That’s the magic of online selling. It offers unmatched convenience, allowing buyers to skip traffic, queues, and store timings. Everything they need is just a few clicks away. And for sellers, this means faster conversions and happier customers.
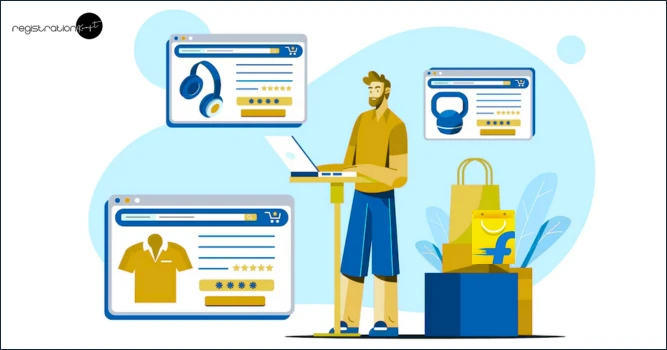
2. Showcase Your Products Like a Pro
Online platforms like Flipkart Seller Hub make it incredibly easy to list your products with beautiful images and detailed descriptions. You don’t need to be a tech expert — just upload high-quality photos, write clear descriptions, and let your products shine. Want to highlight what makes your items special? You can do that too! You can even organize your listings into categories, making it easy for shoppers to find exactly what they need.
3. Save Big on Setup and Overheads
One of the biggest advantages of online selling is the cost-efficiency. You don’t need to spend lakhs on setting up a physical store, hiring staff, or paying utility bills. All those savings can instead be invested into things that really matter — like quality packaging, smart inventory management, faster delivery, and strategic marketing. In short, you get more value from every rupee spent.
4. Sell Anytime, Anywhere
Your store never sleeps when it’s online. Customers can shop at any hour, from any location — even in their pajamas! Plus, online stores don’t have geographical limits. With Flipkart’s vast delivery network across 19,000+ pin codes, your business can reach homes in big cities and small towns alike. That means more customers, more sales, and more growth.
5. Boost Brand Visibility and Credibility
More than 50 crore people shop on Flipkart. That’s a huge audience! Selling online gives your brand instant exposure to millions of potential buyers. And with the right strategies — like running ads, offering deals, and building positive reviews — your brand can become a trusted name that people remember and recommend.
6. Stay One Step Ahead of the Market
Online selling allows you to quickly respond to what’s trending. Is a certain product suddenly in demand? Stock up and highlight it. Are customers asking for discounts or faster shipping? Adjust your offerings instantly. This kind of real-time adaptability gives you a competitive edge and keeps customers coming back.
7. Offer Flexible, Secure Payment Options
Customers love options — especially when it comes to payments. Whether it’s credit/debit cards, UPI, net banking, wallets, or even cash on delivery, Flipkart Seller Hub supports it all. Giving your buyers multiple secure ways to pay increases trust and boosts sales.
Flipkart Seller Registration Process
Dreaming of starting your own online business from the comfort of your home? Flipkart Seller Hub makes that dream easier than ever. In just a few minutes, you can set up your seller account and start reaching millions of customers across India.
To make the process simple and smooth, here’s a friendly 8-step guide to help you register on Flipkart Seller Hub and take your first step toward building a successful online store.
Step 1: Visit Flipkart Seller Hub
Head over to www.seller.flipkart.com and click on the “Start Selling” button.
You’ll be asked to enter your mobile number. Flipkart will send you a One-Time Password (OTP) — just enter it to verify your number.
Next, type in your email address to continue.
Step 2: Choose What You Want to Sell
Now, you’ll be asked: “What are you looking to sell on Flipkart?”
You have two options:
- All Categories (like clothing, electronics, home decor, etc.)
- Only Books
If you choose All Categories, you’ll need to provide and verify your GSTIN (Goods and Services Tax Identification Number). Not sure how to file GST as an eCommerce operator? Let’s simplify here.
If you select Only Books, you’ll only need to verify your PAN card.
Once you fill in the required details, click on “Register & Continue”.
Step 3: Create a Strong Password
Set up a secure password to protect your account.
Your password should be at least 8 characters long and must include:
- One uppercase letter
- One lowercase letter
- One special character (like !, @, #)
After that, enter your full name and your store display name. Then click on “Continue”.
Step 4: Verify Your Email Address
Just like mobile verification, confirming your email is important.
On your dashboard, you’ll see a button next to your email address. Click it, and you’ll receive a verification email with a link.
Open the email, click the link — and you’re done!
Step 5: Add Your Signature
This part is more fun than it sounds. Your e-signature will appear on your invoices, so it’s essential.
You have two options:
- Draw it using your finger, mouse, or stylus
- Create it by typing your name (Flipkart will generate a signature for you)
Once you’re happy with it, click “Add”.
Step 6: Enter Store & Pickup Details
Flipkart needs to know where to pick up your products. So, make sure the details you provide are accurate.
Here’s what you’ll need to enter:
- Store name
- Owner’s name
- A short, catchy description of your store
- Pin code
- Complete address of your pickup location
Click “Save” once everything’s filled in.
Step 7: Add Bank Details
Now, it’s time to make sure you get paid smoothly and on time.
Enter your bank account number and IFSC code. These details must match the ones linked with your GSTIN to avoid any payment delays.
Once verified, Flipkart will use this information to credit your earnings directly to your bank account.
Step 8: Create Your First Product Listing
You’re almost there!
The final step is to list at least one product you want to sell. This is your store’s first impression — so make sure the product details are clear, attractive, and accurate.
Good product listings help buyers make confident decisions and boost your chances of getting orders.
Final Thoughts
Embarking on your journey as an online seller with Flipkart Seller Hub is not just straightforward—it’s transformative. Whether you’re a homemaker turning your passion into profit, a student exploring additional income opportunities, or an entrepreneur expanding your business, Flipkart Seller Hub equips you with the tools, support, and visibility to thrive.
With minimal effort, you can access a nationwide marketplace and connect with millions of customers from the comfort of your home. Take that first step confidently, follow practical guidance, and start building a business that brings pride and success.
Remember, every successful enterprise begins with a simple registration—just like this one.
Wishing you success in your selling journey!
Categories: Business
Tags:
Related Post


